Showing posts with label Fountain City Roller Derby. Show all posts

Sunday, November 25, 2018

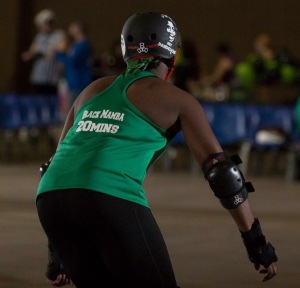
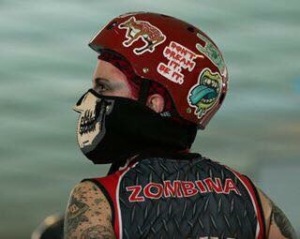
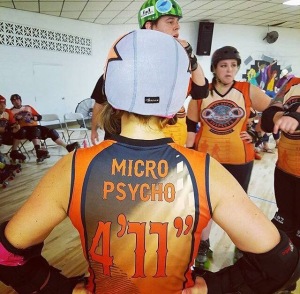
Pick Your Person: A Guide to Choosing Your Derby Name


By Parks And Wreck


You’ve finally decided to strap on those skates and get out on the track, bumpin’ hips with the best of them, the wind flowing through your helmet. Now if only you had the perfect name to go along with those sick, new bruises. Deciding on a name for derby can be a difficult endeavor, plagued with uncertainty and endless puns. The list of potential names you’ve collected may seem overwhelming, but here are some points to consider to help make that list a tad more manageable.

img_2523-1
Photo by Zaftig Unicorn

1. What Makes You Tick?

Every skate name has meaning to it’s owner; be it an inside joke, a play on their own name, paying homage to a favorite tv/video game/book series, hell, even a favorite food. Derby names aren’t just about clever puns and scary sounding names. If something resonates with you in a special way, own it. Don’t be afraid to be you.

2. Fear and Loathing

You wanna be a badass. A rebel. A hard-hitting, teeth-clacking, force to be reckoned with. For many, derby is a chance to live outside of their own personalities and personify that inner warrior on eight wheels. If you want your alias to provoke an emotional response within yourself, and the opposing team, don’t be afraid to dig deep and go for that scary-as-all-hell namesake.
 img_2525-1
Photo courtesy of Zaftig Unicorn Photography

3. Outdated and Full of Regrets

Some references are topical but quickly dated. Tastes come and go, and once that meme you found hilarious a few months ago is buried in internet history, you’ll regret all those tanks you personalized.

4. Reign in the Raunch

This moniker is not simply a skate name. It isn’t just something announced at games and panted on your jersey. The derby name you choose is a representation of yourself. Think of it as a brand. Your brand can be as scary, weird, or nerdy as you’d like, but you might want think about what leagues will allow you to guest skate with that tongue-in-cheek joke. FCRD is a family friendly league and holds their skaters to the same standards.
 

5. Explaining the Joke

Some names invoke a polite smile and a head scratch from teammates and fans alike. Though the name means something awesome or clever to you, the majority tilt their head and try a Google search. If you don’t mind answering “What does your derby name mean?” a thousand times at each bout, then go for it, but those less sociable and easily vexed may want to steer clear.
img_2526-1
Photo by KC Derby Digest

7. Short but Sweet

Out on the track is a completely different, fast paced, world. Strategies change by the second, skaters blur by, and communication is key. Not a single one of my teammates would ever yell “Parks N Wreck, wall up!” Although “Park, get back here!” is much more likely. Your alias is unique to you but, in a pinch, a long winded string of syllables just won’t work on the track. As you run through your list of potential monikers, try also shortening them and see how that sticks with you. Yes, your fake name will also have a nickname. No, it’s not as confusing as it sounds.


8. Lasting Power

Of course, anyone is welcome to mix it up every few years, but that growing pile of outdated merch you had specially made will haunt you from the back of your closet. Skaters of various skill levels and seniority are bound to want to change their name in the future, but if you think carefully and tactfully, your name could potentially live as long as your derby career.

Thursday, October 11, 2018

Sore vs. Hurt vs. Injured

by Mojo GoGo


You are about to become an athlete. Wait! Don’t freak out and run away. It is okay, it won’t happen overnight. And we will help you.

You will not be expected to bench press 250lbs and run a 4 minute mile on the first day. Probably not the last day either. But you are starting a journey that will change you. For some of you, this training may not be too strenuous at first. Perhaps you already work out on a regular basis. For some, this will be a whole new world of physical effort, not to mention a test of willpower.

n90a4659
Photo By KC Derby Digest
While being athletic will help you during this training, willpower and determination are what makes you a roller derby skater. As Rocky said, “It ain’t how many times you get knocked down, it’s how many times you get back up.” And you are going to fall a lot, because falling means you are pushing yourself beyond your comfort zone and improving your skill. It also means that you are exposing your body to soreness and possibly getting hurt or injured.


Being sore after a workout is normal, it means you are pushing yourself a little further than you are used to. Your muscles respond to vigorous use by secreting Lactic acid during a workout. Lactic acid is what makes your muscles feel like they are burning while you are skating. Upping your exercise is what causes “micro tears” (these are considered a good thing in building muscle and are not to be confused with a large scale tissue tear which is an injury) in your muscles which, in turn, is what causes soreness after working out. One of the reasons you need to drink a lot of water and sometimes replenish electrolytes after skating is to help wash away the Lactic acid your muscles have expelled and help the muscle healing/inflammation process that occurs in the next 24-48 hours.


Once training starts, even if you already have a consistent workout regime, you will find that there are some derby specific drills that make your muscles sore – especially the muscles you didn’t even know you had! You might be tempted to skip Wednesday practices if Tuesday practice made you sore. We encourage you not to do this! First, you only get 2 chances to attend practice a week and skipping Wednesday practice takes away half of your opportunity to improve your skills. And second, you can work through the soreness by exercising the second day. The body is an amazingly adaptive structure that acclimates quickly to your new fitness level. Soon you will find that the muscle soreness and congestion is less and less after every work out, and you look forward to the second consecutive day of practice.


However, it is important to recognize the difference between normal soreness and a potential problem. You will no doubt wrestle with some issue or another connected with beginning a new exercise regime. The key is recognizing when you should push through and when you should stop, and you are the only judge on that. If something is sore, try to push through, but if you feel a sudden or sharp pain, or something that does not go away with rest, get yourself checked out.


The next level above soreness is being hurt. Hurt is generally short lived but intense. Hurt is different than sore because it is not a natural part of working out. Hurt means something has gone wrong temporarily, but you can probably treat it yourself. It hurts when you fall on your knees and the knee pad has slipped so instead of landing on padding you land on hard track, or perhaps you unintentionally land on your own skate. It doesn’t feel good and it causes you to stop and take a minute to recover but it generally won’t put you out of skating for the rest of the practice, or if it does, you will feel better pretty quickly and be back at practices soon.


Injured is different situation. Injured means something has gone wrong and generally has long term ramifications. Injured is a concussion, broken bone, torn ligament or the like. Injured puts you out of practice for more than a few days. You probably don’t need to be told that if you think you are injured you need to seek qualified medical help.


There is a fine line between hurt and injured and sometimes hurt starts out feeling like injured and vise-versa. The key is to listen to your body and know yourself. If you feel like something is wrong, it probably is and it is in your best interest to get it checked out. Better to be safe and catch a problem early when it can be handled on a small scale than to ignore the problem and have it turn into something that keeps you off skates for an extended time.


Be safe on the track! Make sure to give yourself a break when you sense that something doesn’t feel right. Don’t hesitate to let your coach or trainer know what is going on and ask for assistance if need be.

Wednesday, October 10, 2018

Making Endurance Yours: Mind over Matter

by Sissy Facecheck
1888899_10152650712809368_575812928_o

Ask a vet how to get through the endurance portion of skills testing and the advice you receive will differ depending on the person.  Like derby, there is no one-size-fits-all way to get through the 20 lap endurance test.  Below, you will find some basic tips from experienced vets ranging from technical to mental to cross-training.  Consider it all, try it all, then use what works for you.  

Technical Tips: Try these first!  These tips are meant to help lay the foundation of good form and speed.  They will help reduce the risk of injury, give you more speed with less effort, and build confidence in your stride.
  1. Get low and use long, full strides – long, full strides may sound counter-intuitive but it’s not.  The lower you go, the deeper you push into your strides, the more power you will get.  Short, choppy strides may keep you moving forward but it will be at a slower, more labor intensive pace.  Watch skaters like Tenacious V or Jam Pa.  Their strides are deliberate, slow and smooth, more like a glide than a step.
  2. Move your feet – When you stop moving your feet, you lose momentum.  When you start moving your feet again, you have to work to gain back that momentum.  Focus on crossing over in the turns and keeping your feet moving.  Combine this with tip #1.  
  3. Skate the Diamond –  hit the apex and outside the straights. Just as important, pick a smooth line between those points. 

    from RollerDerbyAthletics.com
  4. Swing your arms to help gain momentum
  5. Clean your wheels.  The less dirt and grime on your wheels, the more productive they are for you.  You’re less likely to slip and slide into the turns.  And, when you feel stable on your feet you feel more confident in your cross-overs.
  6. BREATHE! In through the nose, out through the mouth.
Cross-training:  Most athletes will tell you, cross-training is an important component.  You can work and strengthen muscles you don’t normally use in your sport of choice, you can build up speed and endurance, strengthen your core and your quads; the benefits go on and on.  
  1. Some of the league’s best players swear by stair sprints and running.   To start, try running at a moderate pace for 2 minutes, then sprint for 30 seconds.  Repeat for 15 minutes, then 20 minutes, and so on.
  2. Take a class a couple times a week:  Yoga, High-intensity interval training, cardio.  It all helps to up your game and give you an edge.
  3. Plyometrics or Jump training:  You can do this at home 5-10 minutes a day.  Burpees, Jump Squats, Skater Jumps the list goes on.  These exercises are designed to build strength and endurance by using explosive bursts of energy in short amounts of time.
Mental Tricks: Derby is 90% mental.  The can-do attitude will most likely give you the edge you’ve been looking for.  The 20-lap endurance test is daunting.  It pushes your mind and body to go when all you want to do is stop.  If you let it, endurance will show you exactly what you are made of and how much farther you can go than you actually thought.  To get out of your head and into the zone, try some of these tricks….
  1. Get a rhythm going.  Count your strides or your breaths.  How many does it take to make 1 lap?  Keep that pace!  Don’t focus on sprinting, focus on pace.
  2. Break those laps down into chunks.  Don’t count 20, count 5, then 5 more, and so on.
  3. Hit open skates with a four minute song.  Challenge yourself to 20 laps before the song ends.
  4. Find a solid skater and keep pace with her (or him).
  5. Be the Little Engine that Could – i think i can, i think i can….
  6. Be positive, expect only your best from yourself!  Don’t get angry or upset if the first time doesn’t pan out.  Derby is about progress.  Just keep going, keep moving and eventually you will get there!
The endurance test doesn’t have to be scary!  Set your goals, come prepared, and celebrate finishing 20 laps!

Monday, October 8, 2018

Foam Rolling

by Jade Bond
20150915_224309
Photo Courtesy of Candii Crusher


Foam rolling—what the heck is it and why should I do it? Have you ever been so sore it hurts to just be alive? Want to learn how to soothe your sore derby-tired muscles and prevent injuries? I have a secret to share with you—foam rolling is your friend! Not only does it work out soreness post exercise, but it can be a good warm up for your muscles beforehand as well. You can buy a basic foam roller from Wal-Mart for about $10, or you can invest in a better quality roller at a sporting goods store for around $25.
20150915_224650
Photo Courtesy of Candii Crusher


I first learned of foam rolling a few years back when I was teaching Zumba. I was teaching 3 or more classes per day, and my knees were killing me. My sports therapist told me to start foam rolling as my IT band was super tight and pulling my knees out of place. I took his advice and gave rolling a shot, but in the back of my head I didn’t believe him. I was so sure that something was very wrong with my painful knees. After a few weeks of foam rolling almost every day, I was pleasantly shocked— my pain was gone! Now I’m a believer, and I foam roll quite frequently. July 2014, I pulled my MCL at the same time that I tore my meniscus 5 minutes before one of our house games (now let me tell you that was a painful bummer). Three months later my knees were still hurting, but it was manageable pain when I foam rolled consistently. I made it through MADE Nationals, and I credit foam rolling with keeping me on my skates.
DSC_0793
Photo Courtesy of Candii Crusher


Foam rolling, more technically known as self-myofascial release, puts pressure on sore muscles and reduces tightness, helping to aid in muscle recovery so that muscles get back to functioning normally. It releases tight trigger point areas that are hard to stretch out in other ways, as well as increasing blood flow to sore areas. In a sense, you are giving yourself a deep tissue message. Now let’s be honest here-in the beginning it can hurt to foam roll. Much like stretching sometimes is uncomfortable; foam rolling in the beginning can be very painful. Using your roller regularly will help—it stops hurting so much and actually feels really good afterward.
20150915_224140
Photo Courtesy of Candii Crusher


How do I foam roll you may be asking? There are myriads of videos on YouTube showing you exactly how; essentially you are using your own body weight to work on your muscles. At first it may feel awkward and weird and you will wonder if you are doing it right. It gets easier with time, and I am happy to show you how to roll at practices. I generally foam roll my legs every day when my knees are bothering me; otherwise, I try to do it on days of heavy exercise (like after derby practice!). You should roll fairly slowly, and you can even “sit” on a tight muscle for 5-10 seconds, holding it before you roll it out. Rolling a specific area for more than one minute is not recommended, as that can lead to more soreness. You don’t ever want to roll a bone or a joint—only muscle. If it hurts too much to roll a specific muscle, roll the areas around it—that will still help loosen up the offending area. With foam rolling, much like stretching you might feel some “good” pain but it shouldn’t be excruciating. Always listen to your body, and always talk to your doctor about any pain or health concerns you may have. Once you’ve been at it for a few weeks, your muscles should feel looser and less sore after foam rolling. Try to work it into your workout days—much like stretching, rolling can prevent injury and help you keep in tip-top shape for derby!

Sunday, October 7, 2018

Membership Details

Fountain City Roller Derby offers many types of membership.  Here is a breakdown of the memberships.


Dues:  You have three options on how you would like to pay.  The monthly paying option is $35 per month.  The quarterly paying option is $90 every three months.  The yearly paying option is $330 per month.  Everyone pays the same dues regardless of your membership type.


Membership Types:


Practice Only:  Come to as many or as few practices as you like.  You may scrimmage if you have passed your Class 3 skills.


Zombie/Recreational League:  This is a non-competitive league.  The teams are not set and they will be different each month that the Zombie League plays in.  Minimum practice requirements are six hours a month.  Class 3 skills required.


House Teams:  Four highly competitive women's house teams (Shotgun Sheilas, Deadly Sirens, Royal Pains and Lovely Lethals).  These teams are drafted in December and will have four games during the season.  Minimum practice requirements to play are eight hours per month, but most coaches will expect more from you.  Class 2 skills required.


Coed Teams:  Three competitive coed teams (Usual Suspects, Public Enemies and The Untouchables).  The teams will be drafted in December and will have four games during the season. 
Minimum practice requirements to play are eight hours per month, but most coaches will expect more from you.  Class 2 skills required.


You may play on Zombie/House/Coed at the same time.  The membership dues stay the same.


Other types of membership:


Ref Membership:  There are no dues, you may come to practices, you have to pass a written ref test and you are expected to be available to ref at scrimmages and games.


Non-skating Official:  There are no dues, you help out during game day and receive free admission to the games.


If you have any questions regarding memberships, please comment below or contact us on the Facebook page.

Thursday, October 4, 2018

Knee Strengthening

Knees are important!  Making them stronger is something that is needed for roller derby.  They will take a beating, but here are some exercises to help strengthen them up.


Roller Derby Athletics has a Happy Knees Training video.  It's short and sweet and fairly easy.  Take a view at it here or over on YouTube.


Here is a short routine that you can use as an off skates warm up:
  • Marching in place – 30 seconds
  • Lunges – 15 reps each side
  • Lateral lunges – 15 reps each side
  • Skater squats – 15 reps
  • Step ups – 15 reps
  • Prone hamstring curls – 15 reps each side
  • Russian hamstring curls – 10 reps
  • Calf raises – 15 reps
  • Scissor jumps – 15 reps
Each exercise should take around 30 seconds.  Set aside 15 minutes to get three rounds in. 

Remember to invest in some nice, cushy knee pads.  While we practice falls, please remember to fall softly and to not slam your knees on the ground; a nice tap-tap will work out well.

Your knees are going to be with you for a long time after derby, take care of them now.

Wednesday, October 3, 2018

Cleaning Your Safety Gear

Skate gear can be expensive.  The best way to save money on new pads is to take care of the ones you already have.  One of the more common reasons to replace pads is not because they are broken, but because the smell has become overwhelming.  I'm going to discuss a few different methods for washing your pads.  Here are some Dos and Don'ts before we get to the actual cleaning.


Don't leave your sweaty pads in your bag after practice.  You're tired from practice and all you want to do is hop in the shower and relax.  Do yourself a solid and take the time to empty your derby bag first.  It can be harder to get the smell out of pads than regular clothes and the bag itself will start to smell.  Unpack everything, spread it all out, and let it dry over night.  Leaving a bag of sweaty gear in your car during a hot, sunny day will be the kind of mistake you only make once.


Use deodorizing spray.  You can purchase name brand and locally produced deodorizing sprays.  There are also easy recipes online to make your own.  Apply it to the outside and inside of your pads and the inside of your helmet.  A quick spritz of inexpensive deodorizing spray at the end of practice can help in the fight against funk.  Don't forget to periodically spray your derby bag, too.


Wash your mouthguard.  Mouths are dirty, germ holes full of bacteria.  Mouthguards can be brushed with toothpaste and a toothbrush.  It's also an option to soak it in mouthwash or denture cleaner for an extra clean and a little minty kick.


Don't heat dry you pads.  Plastic melts.  Just hang them up or spread them out on a table to dry.  It may take up to two days for them to air dry completely.


Clean your helmet liner.  The padding of your helmet can sometimes be removed and washed along with your pads.  If you have a helmet that doesn't disassemble so easily, trying spraying it with a deodorizer, barbicide, or an antibacterial spray like Lysol.


There are multiple methods for washing pads.  Find which one is easiest for you and your available space.


  1. The washing machine.  Close up any Velcro straps so there are as few parts hanging free as possible.  Pads can be placed in a pillowcase that's either knotted shut or closed with a rubber band.  Pads can also be placed directly in the washing machine if you don't mind the noise.  Wash on a gentle cycle with hot water and an extra rinse cycle if available.  Remember, no heat drying.
  2. The bath tub or sink.  Fill your tub or sink with just enough water to fully submerge your pads.  Add around ¼ cup laundry detergent and ¼ cup white vinegar.  Let the pads soak for at least 30 minutes.  Rinse very well and air dry.  Don't worry, the vinegar smell is light and disappears while drying.
  3. The dishwasher.  For this method, place your pads in the top rack of the dishwasher.  Clean them on a light or China cycle.  Again, be sure to have any heat dry cycles turned off.  Otherwise you will melt your pads and cause a very expensive and potentially dangerous mess.

These are a few of the ways to stay on top of derby funk.  Once the smell reaches a certain level of odor, pads will no longer be recoverable, leaving you with the only option of replacing them.  Having super smelly pads is also a great way to lessen the number of hits you take because no one will want to be so close to you.  Periodic cleaning is also good for bacteria management. A good rule of thumb is the nicer you are to your gear equals how nice your gear is to you.

Monday, October 1, 2018

One Exercise Will Help You Get Up Faster

Burpees!  Learn to love them!  They will help you get off the floor faster when you fall.  Falling will happen and the recovery part is important.


Roller Derby Athletics has a video that shows you eight ways to do burpees.  Start out simple, challenge yourself and move up to the more advanced moves. 


In addition to them helping you get off the floor faster in roller derby, they have lots of side benefits:
1.  This exercise works a ton of muscle groups!  This will help you out all around.
2.  They torch calories.
3. You can do them without any equipment.  Taking a walk in the park?  Drop and do a few burpees.  Hanging out a home and watching TV?  You can do burpees while watching your favorite shows!
4. Already have a workout you love?  Add burpees to it!


Find a Burpee Challenge on Pinterest or via a Google Search.  Stick to it and conquer the burpees.


Here is an example of a Burpee Challenge.


So grab a fellow Fresh Meat skater to take the challenge!  Challenge one of your trainers, we would happily take part in one.  Post it in our Facebook group.  Having a person do the challenge with you helps you to be accountable.


Wednesday, September 26, 2018

Toe Stop Drills and Skills

We started working with our toe stops this week. If you are able to utilize your toe stops in a controlled manner, it can take you far in derby.  Remember, practice makes you better and practicing on your toe stops makes you more comfortable. 


First off, take a look at your toe stops.  Where are they positioned for you?  You need it positioned where you feel comfortable and your foot isn't dying inside your skate.  Most people go with a one wheel under the back wheel and adjust their toe stops to that height.  How big are your toe stops?  If you have crappy little ones, I would suggest saving to invest in some slightly larger ones.  This will make it much easier on you.  Smaller toe stops make you work much harder in your toe stop runs and drills. 


Here are a few easy things you can do to feel more comfortable on your toe stops:


Up Downs  -- stand in good derby stance with all eight wheels on the ground.  Shift your weight to go up on your toe stops by lifting up on your heels.  Your stance should stay the same and the only thing moving is your feet. 


Squats on your toe stops --  Go up on your toe stops and squat.  This will help you feel comfortable by being able to go lower on your toe stops.


Balancing on one foot  -- Go up on your toe stops, find your center of balance and pick up one of your skates.  This is like the one footed glide but on toe stops.  Engage your core and balance.  Challenge yourself each time to hold it longer.


Side to side steps on your toe stops  --  Go up on your toe stops and step from side to side.  Start with shorter steps and eventually move into larger steps.  Challenge yourself.  This will help with lateral movements down the road.


Toe Stop Walking and Jogging  -- we practiced this during the training session.  Get up on your toe stops and walk/jog forward then go backwards.  Find your center of balance and increase your speed as you go! 


These are all things you can do at home in your skates.  You can also do these during open skate.


Once you feel more comfortable on your toe stops, start pushing the comfort zone. Ask your trainers for more ideas on challenging toe stop drills. 

Tuesday, September 25, 2018

Week 3 -- More Derby Skills

By Striking Dervish


Now that you have covered some of the basics, we are spending Week 3 adding more derby skills as well as beginning to pick up our feet.

Off Skates Workout

We begin with a reminder of the things we can do off skates to help prepare us for our tested skills!
  • Jogging to work on cardio in preparation for your endurance test
  • Squat walks to work on derby stance
  • Wall sits build leg strength for proper derby stance
  • Lunges work leg strength for getting up from a single knee fall
  • Squat thrusts / burpees practice the movement of getting to toe stops from a fallen position

Stepping

In order to work on balance on your skates, we practice stepping while standing still.  While practicing this skill, please keep the following in mind:
  • Stay in derby stance with knees soft
  • Try to balance over all four wheels of each skate to avoid rolling
  • Engage your core
  • Lift your knees slightly to avoid rolling
  • Keep your eyes and chest up
All of these should be practiced and will be tested:
  1. Stepping Forward – take as large of a step forward as you can without rolling
  2. Stepping Backwards – take as large of a step backwards as you can without rolling.  Remember to pick up your knees in order to be able to place your foot wholly on the floor at one time.
  3. Stepping side to side – step out and together in either direction
  4. Hop-to’s – moving sideways, pick up the foot furthest from the direction you are going (foot A), hopping upward with the foot closest to the direction you are going (foot B), then set foot A down and step out with foot B.
  5. Grapevines – as controlled as possible, step over Foot A with Foot B, and step out with Foot A.  Then step behind Foot A with Foot B, and step out with Foot A.  Repeat a few times in each direction.  Try to keep your toes pointed forward at all times.

Toe Stop Run

Roller derby skaters get moving off the start line by running on their toe stops.  The toe stop provides better stability and a basepoint for pushing off to get started quickly.  New skaters will need to get comfortable on their toe stops before they are able to run on them.
In Week 3, we work on increasing speed and effectiveness of the toe stop run by using it to get moving when working on all other skills throughout the practice.

Getting Comfortable

We begin by simply walking on our toe stops.  The toe stops should be at a comfortable position where you are not balanced too much on the front wheels.  You may need to move the toe stops up or down (closer to the skate or closer to the floor), and they are adjustable in this fashion.  The specific position is a personal preference, and you may need to make a few adjustments before determining where yours should be.
If you have your own skates, spending some time walking around your house on your toe stops will help you get comfortable.  Remember to keep your knees soft and be wary of obstacles!

Jogging

Once you feel comfortable on your toe stops, try jogging on them.  Start with small steps and slow speed and gradually go for longer strides and more speed.
You will also need to practice transitioning between the toe stop and skating.  This should eventually be a seamless process and may require practicing setting the foot down on all four wheels from the on-toe position.

Running

The ideal toe stop run is 3 to 5 steps on your toe stops.  The strides should increase in length throughout the run, and you should increase your speed quickly by doing so.  Think of digging into the floor with your toe stops.  In order to make the most of the run, lean forward throughout, but keep eyes upward.  The lean should eventually feel close to falling forward and will actually help you with your momentum forward.

Baseball Slides

Baseball slides are the only fall we practice falling backwards.  We still “pick a cheek” and focus on the side of the body for this fall to avoid hitting our tailbone.  The application for baseball slides are when we are moving at a fast pace and may be careening out of control but falling backwards.

Standard

In a standard baseball slide, we are only focused on the fall itself, ending on our side on the ground.  To practice this fall, follow these steps:
  1. Set a knee down, similar to a single knee fall.
  2. Move the foot of the downed leg underneath you while pivoting the knee outwards. The downed leg should remain bent so that you are forming a 4 with your legs.
  3. As the foot comes forward, shift your weight to the side of the downed knee in order to ease onto that hip and side of the body
  4. Extend the arm closest to the floor so that your hand is above your head, and your arm acts as a cushion for your head.
  5. Continue easing yourself down to the floor until you end up stopped on the floor completely laid out on your side with the initially downed leg bend underneath you.
Things to keep in mind:
  • Focus on a controlled fall.  At no point should any part of your body slam onto the floor.
  • Try to keep the motion of the fall moving in one direction as opposed to veering off to the side.
  • Avoid flailing with the top leg.

Roll to Stomach

Separate to the “standard” baseball slide which ends on the floor, we also practice a baseball slide with roll to stomach which is completed by getting up off the floor.  The initial baseball slide is exactly the same, but once you have safely slid to your side, you roll to your stomach and then come to a standing position.
In order to get up, using your toe stops is preferable.  To break down the “getting up” portion:
  1. Roll to your stomach
  2. Raise onto all fours
  3. Lift your feet onto the toe stops so that you are in plank position
  4. Hop your feet underneath your body, landing on your toe stops (similar to the second half of a burpee/squat thrust)
  5. Once you are balanced on your toe stops with legs bent, stand up
Once you have the baseball slide with roll to stomach motion down, you may get to a point where you can time the roll to happen prior to stopping the slide and then use the end of the slide to get your feet underneath you.  In this way, no hop to your feet is necessary.  Instead your toe stops go down and you bend your legs to catch your momentum at the end of the slide until your toes are underneath you and you can stand.

Single Knee with 180 Turn

Many times, after a fall, we will not be facing the track.  If we are able to turn ourselves towards the track before stopping, we can then stand up and quickly get back to game play using a toe stop run.  For this reason, we practice the single knee fall with a 180 turn.
To perform this skill, we start with the basic single knee fall.  Before coming to a complete stop, engage your core to remain slightly rigid in the upper body while you turn your shoulders towards the side of the downed knee.  Use that knee as a pivot point to turn around, removing most of the weight from the foot that is still on the floor.  Ideally, you will end up facing the opposite direction from where you started while still in the single knee fall position.
To get off the floor, try putting the front foot toe stop down and centering your weight over it to stand up.

Leaving the Ground

With all of the action that happens on the track, we need to be able to leave the ground to avoid unexpected obstacles or use quick feet to get to where we need to go.  For that reason, we practice jumping and hopping.

Jumping

By jumping, we mean leaving the ground from two feet and landing on two feet.  In order to do so, you should take off from bent legs and land on bent legs.  Your legs act as springs under you to give you power for the jump and to cushion the impact of the landing.  While working to increase height, think about bringing your knees up towards your chest as opposed to bringing your feet up to your rear.
For testing purposes, you will be tested on jumping over an object.  Remember to bring your knees up when going for height.  Note also that jumping forward is not necessary.  Your momentum skating towards the object will naturally move you past the object.  You only need to lift your feet over it.  A successful jump over a 3″, 9″, or 18″ object indicates a passing score for Class 3, 2, and 1, respectively.

Hopping

By hopping, we mean leaving one foot and landing on the other.  In order for it to be considered hopping and not stepping, there should be air space under both feet at one moment of time.  Similar to jumping, you should take off of a bent knee and land on a bent knee.
For testing purposes, you will be hopping through a line of people.  Don’t worry too much about this until we get to our pace week (Week 6).

Mohawks

While we are getting comfortable picking up our feet, we also introduce mohawks.  This skill will become more important next week when we add to it.  A mohawk in skating is when we have one foot facing in each direction (one forwards and one backwards).

Finding the Position

To get the feel of the position, you can face a wall and place the insides of your feet against the wall.  Make sure that your feet are far enough apart and that your knees are bent.  This will require opening up your hips, and may take some practice.
When attempting a mohawk while skating, you will need to balance on one foot, pick up the opposing foot, turn it fully backwards, and place it down at the heel of the forwards foot.  This position will not be easy at first and is why we practice it against the wall.  You have been practicing t-stops, and your foot very well may want to set down in the T.  You may need to think about overturning your foot in order to get the placement.  If the foot is not fully turned backwards, you will likely turn in a curve.

Mohawks Around the Turn

In order to gradually get to the full mohawk position, you can start by doing mohawks around the turn.  In the counter-clockwise direction, this means balancing on your right foot, picking up your left foot, and setting it down backwards.  Traveling around the turn requires you to open up your feet into a v, and not a full mohawk.

Mohawks in the Straightaway

Once you feel comfortable in the turn, you can try the straightaway, which requires fully turning your foot backwards in order to continue a straight path.

Crossover Work

Last week we worked on edging and the ability to hold a one legged glide during a turn.  Believe it or not, this is the first obstacle in learning crossovers.  We continue our work on crossovers by purposefully changing our edging base leg around the turn (or stepping around the turn).  Next week we’ll start working on increasing the efficiency of the crossover.

Conclusion

This week we added a few specific skills to our repertoire, but the main focus was on picking up our skates (through stepping, hopping, and jumping), and using our toe stops in their two major derby functions (getting started and getting up off the floor).  These skills are essential for derby skaters and are getting us closer to the track!

Thursday, September 13, 2018

The basics: Plow Stops

Plow Stops are the second derby stop that we learn in practice.  Plow Stops are my favorite and so much more effective than a T-Stop. 
Remember the three steps to a plow stop:
  • Spread your legs a bit wider than your shoulders.
  • Use your butt as a counter balance and sit down lower. 
  • Push on your inside edges.  Push your toes together and your heels down into the ground.  Dig those edges until you stop.  Some people can stop on a dime, others take a little longer and it’s okay.
Mel Breakdown throwing a plow stop during the game.
Start low!  Like everything in derby, it is harder if you are standing up or not as low as you could be. 
Make sure your knees are bendy!  Do not lock your knees.  You lose your stability you had when you were low.  We know you aren’t low if your knees are locked.
The stop comes from your inside edges.  Those wheels will slip and you will hear a chattering noise.  This is completely normal.  If the plow stops are quiet, you are not putting enough pressure on your inside edges.  Get the feel for it.  One side might require less pressure than the other.
Stay low and don’t be like a buoy and bob around.
Here is another good source for information on Plow Stops:

Tuesday, September 11, 2018

Week 2 - Edging

by Striking Dervish


Week 2 is dedicated to the concept of edging. Edging is essential in order to do more than just move forward.

Some basics about edging

The term edging is commonly associated with ice hockey because the blade on the bottom of an ice hockey skate has edges to it. The transfer of weight to the inside and outside edge is essential for turning and performing various skills.
Quad skates work in a similar manner with a truck underneath the skate that can move from side to side. Applying pressure with the outside or inside of your foot will move your trucks back and forth and allow for turning. Part of the reason why your skates should be fitted well to your foot is so that the trucks respond well to what your feet are telling it to do!
If you have brand new skates, the trucks will likely be stiff, so you’ll want to have them loosened. Please ask a vet or coach at practice if you need to loosen your skates. Many will have a tool and can help you. Usually, the best option is to loosen it a quarter turn per practice or skate session until it feels comfortable.

Two-Footed Edging

To get the idea of how edging works, we start by practicing it on two feet. To turn, you must push down on the side of the skate towards the direction you want to turn. In that way, to turn left, you should push down on the outside of your left skate and the inside of your right skate. Similarly, to turn right, you should push down on the inside of your left skate and the outside of your right skate.

Skiis

The skill we call “skiis” looks very much like someone skiing down a slope, moving from side to side to navigate the terrain and control speed.
Start by striding a couple of times to get moving. Then with your feet together, use the edging concept to make your skates turn in one direction and then switch sides to turn in the other, making a weaving motion. Here are a couple of other points to think about to help with the skill:
  • Think of pointing your toes and knees in the direction you are turning.
  • Try to avoid only using your knees to turn yourself; more of the motion should be in the feet/ankles.
  • Throwing your hips towards the outer point of your arc will help the turn-back to the opposite direction.
  • Focus on keeping your upper body controlled; this skill mostly happens from the waist down.
  • As in all derby skills, remember to bend your knees!

Weaving Around Cones

Once you have the idea of edges, you can move on to targeted weaving by doing the same ski motion around a straight line of cones. The closer together the cones, the harder the skill will be. Be sure to stay low by bending your knees and dropping your butt. Do not bend over at the waist and lean over. The movement is really from the waist down, so your upper body should not move considerably. Avoid flailing your arms; instead keep them at your side, or if necessary while starting, out to the sides to also make note of whether or not you are tipping from side to side.

Watermelons

The watermelons we worked on in Week 1 can be improved by using the concepts of eding.  Instead of using them to turn by leaning your feet towards the same side of your body, we focus on leaning on the outside of both skates and then the inside of both skates. This back and forth motion will help move your feet out and in underneath you.

Figure 8’s

Figure 8’s are similar to a watermelon where the feet move out and in, but instead of bringing the feet back together side by side, you line them up one in front of the other, switching sides each time. Here are some points to keep in mind:
  • Remember to keep your knees soft and your butt down.
  • Avoid standing up when your feet come together.
  • Make sure you are using both legs. One leg may be stronger than the other, but you should not be moving one leg around the other each time. Work towards evening out the pull from each side to strengthen your legs if need be.

Cutting

Cutting refers to a more sharp turn accomplished by pushing on the edges of the skates harder than is necessary to just make a wide arc. Applied to derby, this allows for lateral movement on the track.

Cutting Cones

Cones are an extremely useful tool for practicing cutting because it serves as a gauge of how tight we can make our turns. When cutting around a cone, the foot closest to the cone should lead in front of the foot furthest from the cone. Concentrate on pushing down on the edges of your skates to turn around the outside of the cone. Some pointers to keep in mind:
  • Remember to stay low by keeping your butt down (not lowering your chest). Doing so will provide more balance and motion in the lower half of the body.
  • Avoid bobbing up and down between cones by staying low throughout the drill.
  • Avoid flailing the arms by keeping them at your sides. If necessary, hold your arms out to the sides to ensure you are not tipping your body from side to side during the drill. Most of the work should happen in the lower half of the body.
  • Do not look at your feet. Instead concentrate on the next cone in the series.
  • In order to switch you feet between cones, you can figure 8 in between them. Eventually, you will learn how to crossover in between them.

Cutting from Side to Side

Minimum skills testing does not include cutting cones, but skaters must be able to demonstrate the ability to cut from side to side on the track. Practice this by skating along the inside line and cutting out as quickly and sharply as possible to the outside line. Then cut from the outside line to the inside line.

One Footed Edging

Once you have the concept of edging down, challenge yourself to try edging on one foot. Being able to control your direction while on one foot is an essential building block for crossovers and various other derby skills.

One Footed Glides on a Turn

In Week 1, we practiced one footed glides in a straight line. Now we are focused on gliding around the turn of the track while balanced on one foot. The same key points apply:
  • Be sure you are balanced over the center of your base leg before picking up the other leg.
  • Keep your knee soft to help with your balance.
However, in order to turn, you will also need to focus on your edges! It will take time to find the right balance “sweet spot.” While you work on finding that spot, these things will help:
  • You will need to lean your body towards the center of the track. However, don’t “teapot” the top of your body; keep your core tight and drop your inside hip into the turn.
  • Keep your nose, chest, and knees pointing in the direction you are going (not towards the outside of the track). One way to encourage this posture is to tuck the arm closest to the inside of the track behind you.
Make sure you are practicing both legs! When traveling counterclockwise on the track (usual direction), that means you are balancing on the outside of your left skate when your left foot is down or balancing on the inside of your right skate when your right foot is down. Very often, finding the balance point of your outside foot is more difficult for skaters, but it very important for effective crossovers to work on it. When you get comfortable going the regular direction, try the clockwise direction!

Circles

For a more focused practice of the one footed edging, focus on a circle so that you are constantly turning. To get started, leave one foot on the ground and paddle with the other foot to gain momentum and get a feel for where you balance point should be. When you are ready, pick up the other leg and see how far you can continue turning with your leg up. Be sure to practice both legs in both directions!

Stopping

Plow Stops

Plow stops or snowplows are the second derby stop we learn. This stop allows for the skater to remain lower and more stable should they be challenged on the track while slowing. The stop is accomplished by turning the feet inwards so that they look similar to a wedged plow.
To execute a snowplow, widen your stance while skating and bring the feet together in a similar motion to a watermelon. Concentrate on pointing your toes inward and pushing your heels out and forward while pushing your inside edges (more edging!) into the ground but leaving all eight wheels on the floor. Your butt should act as a counterbalance by sitting back. Remember to keep your knees soft to increase stability and balance. The foot turn should begin from the wide stance and increase in pressure while the feet come together. The stop should occur completely by the time the feet are approximately shoulder width apart. Stopping while still in a wide stance will hinder consequent movement.

Conclusion

Being able to balance on your skates is extremely important for roller derby. Becoming familiar and comfortable on your edges will significantly help all skills in the upcoming weeks! Play around on your edges at open skates so you can find the right formula for turning, cutting, and balancing. Making yourself uncomfortable is often the only way to really get comfortable, so wear your pads and always remember that falling is learning!

Pick Your Person: A Guide to Choosing Your Derby Name

By Parks And Wreck You’ve finally decided to strap on those skates and get out on the track, bumpin’ hips with the best of them, the wi...