
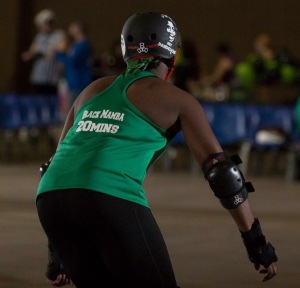
Now that you have covered some of the basics, we are spending Week 3 adding more derby skills as well as beginning to pick up our feet.
Off Skates Workout
We begin with a reminder of the things we can do off skates to help prepare us for our tested skills!- Jogging to work on cardio in preparation for your endurance test
- Squat walks to work on derby stance
- Wall sits build leg strength for proper derby stance
- Lunges work leg strength for getting up from a single knee fall
- Squat thrusts / burpees practice the movement of getting to toe stops from a fallen position
Stepping
In order to work on balance on your skates, we practice stepping while standing still. While practicing this skill, please keep the following in mind:- Stay in derby stance with knees soft
- Try to balance over all four wheels of each skate to avoid rolling
- Engage your core
- Lift your knees slightly to avoid rolling
- Keep your eyes and chest up
- Stepping Forward – take as large of a step forward as you can without rolling
- Stepping Backwards – take as large of a step backwards as you can without rolling. Remember to pick up your knees in order to be able to place your foot wholly on the floor at one time.
- Stepping side to side – step out and together in either direction
- Hop-to’s – moving sideways, pick up the foot furthest from the direction you are going (foot A), hopping upward with the foot closest to the direction you are going (foot B), then set foot A down and step out with foot B.
- Grapevines – as controlled as possible, step over Foot A with Foot B, and step out with Foot A. Then step behind Foot A with Foot B, and step out with Foot A. Repeat a few times in each direction. Try to keep your toes pointed forward at all times.
Toe Stop Run
Roller derby skaters get moving off the start line by running on their toe stops. The toe stop provides better stability and a basepoint for pushing off to get started quickly. New skaters will need to get comfortable on their toe stops before they are able to run on them.In Week 3, we work on increasing speed and effectiveness of the toe stop run by using it to get moving when working on all other skills throughout the practice.
Getting Comfortable
We begin by simply walking on our toe stops. The toe stops should be at a comfortable position where you are not balanced too much on the front wheels. You may need to move the toe stops up or down (closer to the skate or closer to the floor), and they are adjustable in this fashion. The specific position is a personal preference, and you may need to make a few adjustments before determining where yours should be.If you have your own skates, spending some time walking around your house on your toe stops will help you get comfortable. Remember to keep your knees soft and be wary of obstacles!
Jogging
Once you feel comfortable on your toe stops, try jogging on them. Start with small steps and slow speed and gradually go for longer strides and more speed.You will also need to practice transitioning between the toe stop and skating. This should eventually be a seamless process and may require practicing setting the foot down on all four wheels from the on-toe position.
Running
The ideal toe stop run is 3 to 5 steps on your toe stops. The strides should increase in length throughout the run, and you should increase your speed quickly by doing so. Think of digging into the floor with your toe stops. In order to make the most of the run, lean forward throughout, but keep eyes upward. The lean should eventually feel close to falling forward and will actually help you with your momentum forward.Baseball Slides
Baseball slides are the only fall we practice falling backwards. We still “pick a cheek” and focus on the side of the body for this fall to avoid hitting our tailbone. The application for baseball slides are when we are moving at a fast pace and may be careening out of control but falling backwards.Standard
In a standard baseball slide, we are only focused on the fall itself, ending on our side on the ground. To practice this fall, follow these steps:- Set a knee down, similar to a single knee fall.
- Move the foot of the downed leg underneath you while pivoting the knee outwards. The downed leg should remain bent so that you are forming a 4 with your legs.
- As the foot comes forward, shift your weight to the side of the downed knee in order to ease onto that hip and side of the body
- Extend the arm closest to the floor so that your hand is above your head, and your arm acts as a cushion for your head.
- Continue easing yourself down to the floor until you end up stopped on the floor completely laid out on your side with the initially downed leg bend underneath you.
- Focus on a controlled fall. At no point should any part of your body slam onto the floor.
- Try to keep the motion of the fall moving in one direction as opposed to veering off to the side.
- Avoid flailing with the top leg.
Roll to Stomach
Separate to the “standard” baseball slide which ends on the floor, we also practice a baseball slide with roll to stomach which is completed by getting up off the floor. The initial baseball slide is exactly the same, but once you have safely slid to your side, you roll to your stomach and then come to a standing position.In order to get up, using your toe stops is preferable. To break down the “getting up” portion:
- Roll to your stomach
- Raise onto all fours
- Lift your feet onto the toe stops so that you are in plank position
- Hop your feet underneath your body, landing on your toe stops (similar to the second half of a burpee/squat thrust)
- Once you are balanced on your toe stops with legs bent, stand up
Single Knee with 180 Turn
Many times, after a fall, we will not be facing the track. If we are able to turn ourselves towards the track before stopping, we can then stand up and quickly get back to game play using a toe stop run. For this reason, we practice the single knee fall with a 180 turn.To perform this skill, we start with the basic single knee fall. Before coming to a complete stop, engage your core to remain slightly rigid in the upper body while you turn your shoulders towards the side of the downed knee. Use that knee as a pivot point to turn around, removing most of the weight from the foot that is still on the floor. Ideally, you will end up facing the opposite direction from where you started while still in the single knee fall position.
To get off the floor, try putting the front foot toe stop down and centering your weight over it to stand up.
Leaving the Ground
With all of the action that happens on the track, we need to be able to leave the ground to avoid unexpected obstacles or use quick feet to get to where we need to go. For that reason, we practice jumping and hopping.Jumping
By jumping, we mean leaving the ground from two feet and landing on two feet. In order to do so, you should take off from bent legs and land on bent legs. Your legs act as springs under you to give you power for the jump and to cushion the impact of the landing. While working to increase height, think about bringing your knees up towards your chest as opposed to bringing your feet up to your rear.For testing purposes, you will be tested on jumping over an object. Remember to bring your knees up when going for height. Note also that jumping forward is not necessary. Your momentum skating towards the object will naturally move you past the object. You only need to lift your feet over it. A successful jump over a 3″, 9″, or 18″ object indicates a passing score for Class 3, 2, and 1, respectively.
Hopping
By hopping, we mean leaving one foot and landing on the other. In order for it to be considered hopping and not stepping, there should be air space under both feet at one moment of time. Similar to jumping, you should take off of a bent knee and land on a bent knee.For testing purposes, you will be hopping through a line of people. Don’t worry too much about this until we get to our pace week (Week 6).
Mohawks
While we are getting comfortable picking up our feet, we also introduce mohawks. This skill will become more important next week when we add to it. A mohawk in skating is when we have one foot facing in each direction (one forwards and one backwards).Finding the Position
To get the feel of the position, you can face a wall and place the insides of your feet against the wall. Make sure that your feet are far enough apart and that your knees are bent. This will require opening up your hips, and may take some practice.When attempting a mohawk while skating, you will need to balance on one foot, pick up the opposing foot, turn it fully backwards, and place it down at the heel of the forwards foot. This position will not be easy at first and is why we practice it against the wall. You have been practicing t-stops, and your foot very well may want to set down in the T. You may need to think about overturning your foot in order to get the placement. If the foot is not fully turned backwards, you will likely turn in a curve.


No comments:
Post a Comment
Leave us a message and we will get back to you as soon as possible.