Showing posts with label Roller Derby. Show all posts

Sunday, November 25, 2018

Pick Your Person: A Guide to Choosing Your Derby Name


By Parks And Wreck


You’ve finally decided to strap on those skates and get out on the track, bumpin’ hips with the best of them, the wind flowing through your helmet. Now if only you had the perfect name to go along with those sick, new bruises. Deciding on a name for derby can be a difficult endeavor, plagued with uncertainty and endless puns. The list of potential names you’ve collected may seem overwhelming, but here are some points to consider to help make that list a tad more manageable.

img_2523-1
Photo by Zaftig Unicorn

1. What Makes You Tick?

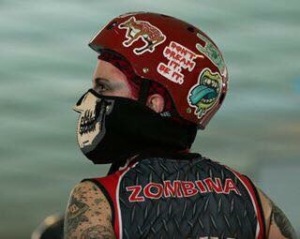
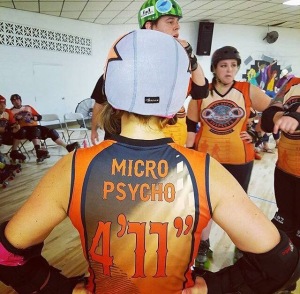
Every skate name has meaning to it’s owner; be it an inside joke, a play on their own name, paying homage to a favorite tv/video game/book series, hell, even a favorite food. Derby names aren’t just about clever puns and scary sounding names. If something resonates with you in a special way, own it. Don’t be afraid to be you.

2. Fear and Loathing

You wanna be a badass. A rebel. A hard-hitting, teeth-clacking, force to be reckoned with. For many, derby is a chance to live outside of their own personalities and personify that inner warrior on eight wheels. If you want your alias to provoke an emotional response within yourself, and the opposing team, don’t be afraid to dig deep and go for that scary-as-all-hell namesake.
 img_2525-1
Photo courtesy of Zaftig Unicorn Photography

3. Outdated and Full of Regrets

Some references are topical but quickly dated. Tastes come and go, and once that meme you found hilarious a few months ago is buried in internet history, you’ll regret all those tanks you personalized.

4. Reign in the Raunch

This moniker is not simply a skate name. It isn’t just something announced at games and panted on your jersey. The derby name you choose is a representation of yourself. Think of it as a brand. Your brand can be as scary, weird, or nerdy as you’d like, but you might want think about what leagues will allow you to guest skate with that tongue-in-cheek joke. FCRD is a family friendly league and holds their skaters to the same standards.
 

5. Explaining the Joke

Some names invoke a polite smile and a head scratch from teammates and fans alike. Though the name means something awesome or clever to you, the majority tilt their head and try a Google search. If you don’t mind answering “What does your derby name mean?” a thousand times at each bout, then go for it, but those less sociable and easily vexed may want to steer clear.
img_2526-1
Photo by KC Derby Digest

7. Short but Sweet

Out on the track is a completely different, fast paced, world. Strategies change by the second, skaters blur by, and communication is key. Not a single one of my teammates would ever yell “Parks N Wreck, wall up!” Although “Park, get back here!” is much more likely. Your alias is unique to you but, in a pinch, a long winded string of syllables just won’t work on the track. As you run through your list of potential monikers, try also shortening them and see how that sticks with you. Yes, your fake name will also have a nickname. No, it’s not as confusing as it sounds.


8. Lasting Power

Of course, anyone is welcome to mix it up every few years, but that growing pile of outdated merch you had specially made will haunt you from the back of your closet. Skaters of various skill levels and seniority are bound to want to change their name in the future, but if you think carefully and tactfully, your name could potentially live as long as your derby career.

Wednesday, October 10, 2018

Making Endurance Yours: Mind over Matter

by Sissy Facecheck
1888899_10152650712809368_575812928_o

Ask a vet how to get through the endurance portion of skills testing and the advice you receive will differ depending on the person.  Like derby, there is no one-size-fits-all way to get through the 20 lap endurance test.  Below, you will find some basic tips from experienced vets ranging from technical to mental to cross-training.  Consider it all, try it all, then use what works for you.  

Technical Tips: Try these first!  These tips are meant to help lay the foundation of good form and speed.  They will help reduce the risk of injury, give you more speed with less effort, and build confidence in your stride.
  1. Get low and use long, full strides – long, full strides may sound counter-intuitive but it’s not.  The lower you go, the deeper you push into your strides, the more power you will get.  Short, choppy strides may keep you moving forward but it will be at a slower, more labor intensive pace.  Watch skaters like Tenacious V or Jam Pa.  Their strides are deliberate, slow and smooth, more like a glide than a step.
  2. Move your feet – When you stop moving your feet, you lose momentum.  When you start moving your feet again, you have to work to gain back that momentum.  Focus on crossing over in the turns and keeping your feet moving.  Combine this with tip #1.  
  3. Skate the Diamond –  hit the apex and outside the straights. Just as important, pick a smooth line between those points. 

    from RollerDerbyAthletics.com
  4. Swing your arms to help gain momentum
  5. Clean your wheels.  The less dirt and grime on your wheels, the more productive they are for you.  You’re less likely to slip and slide into the turns.  And, when you feel stable on your feet you feel more confident in your cross-overs.
  6. BREATHE! In through the nose, out through the mouth.
Cross-training:  Most athletes will tell you, cross-training is an important component.  You can work and strengthen muscles you don’t normally use in your sport of choice, you can build up speed and endurance, strengthen your core and your quads; the benefits go on and on.  
  1. Some of the league’s best players swear by stair sprints and running.   To start, try running at a moderate pace for 2 minutes, then sprint for 30 seconds.  Repeat for 15 minutes, then 20 minutes, and so on.
  2. Take a class a couple times a week:  Yoga, High-intensity interval training, cardio.  It all helps to up your game and give you an edge.
  3. Plyometrics or Jump training:  You can do this at home 5-10 minutes a day.  Burpees, Jump Squats, Skater Jumps the list goes on.  These exercises are designed to build strength and endurance by using explosive bursts of energy in short amounts of time.
Mental Tricks: Derby is 90% mental.  The can-do attitude will most likely give you the edge you’ve been looking for.  The 20-lap endurance test is daunting.  It pushes your mind and body to go when all you want to do is stop.  If you let it, endurance will show you exactly what you are made of and how much farther you can go than you actually thought.  To get out of your head and into the zone, try some of these tricks….
  1. Get a rhythm going.  Count your strides or your breaths.  How many does it take to make 1 lap?  Keep that pace!  Don’t focus on sprinting, focus on pace.
  2. Break those laps down into chunks.  Don’t count 20, count 5, then 5 more, and so on.
  3. Hit open skates with a four minute song.  Challenge yourself to 20 laps before the song ends.
  4. Find a solid skater and keep pace with her (or him).
  5. Be the Little Engine that Could – i think i can, i think i can….
  6. Be positive, expect only your best from yourself!  Don’t get angry or upset if the first time doesn’t pan out.  Derby is about progress.  Just keep going, keep moving and eventually you will get there!
The endurance test doesn’t have to be scary!  Set your goals, come prepared, and celebrate finishing 20 laps!

Monday, October 8, 2018

Foam Rolling

by Jade Bond
20150915_224309
Photo Courtesy of Candii Crusher


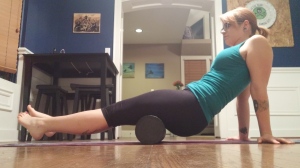
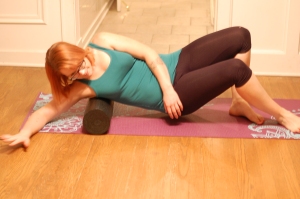
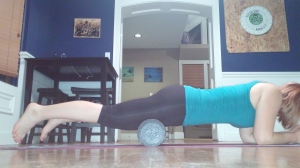
Foam rolling—what the heck is it and why should I do it? Have you ever been so sore it hurts to just be alive? Want to learn how to soothe your sore derby-tired muscles and prevent injuries? I have a secret to share with you—foam rolling is your friend! Not only does it work out soreness post exercise, but it can be a good warm up for your muscles beforehand as well. You can buy a basic foam roller from Wal-Mart for about $10, or you can invest in a better quality roller at a sporting goods store for around $25.
20150915_224650
Photo Courtesy of Candii Crusher


I first learned of foam rolling a few years back when I was teaching Zumba. I was teaching 3 or more classes per day, and my knees were killing me. My sports therapist told me to start foam rolling as my IT band was super tight and pulling my knees out of place. I took his advice and gave rolling a shot, but in the back of my head I didn’t believe him. I was so sure that something was very wrong with my painful knees. After a few weeks of foam rolling almost every day, I was pleasantly shocked— my pain was gone! Now I’m a believer, and I foam roll quite frequently. July 2014, I pulled my MCL at the same time that I tore my meniscus 5 minutes before one of our house games (now let me tell you that was a painful bummer). Three months later my knees were still hurting, but it was manageable pain when I foam rolled consistently. I made it through MADE Nationals, and I credit foam rolling with keeping me on my skates.
DSC_0793
Photo Courtesy of Candii Crusher


Foam rolling, more technically known as self-myofascial release, puts pressure on sore muscles and reduces tightness, helping to aid in muscle recovery so that muscles get back to functioning normally. It releases tight trigger point areas that are hard to stretch out in other ways, as well as increasing blood flow to sore areas. In a sense, you are giving yourself a deep tissue message. Now let’s be honest here-in the beginning it can hurt to foam roll. Much like stretching sometimes is uncomfortable; foam rolling in the beginning can be very painful. Using your roller regularly will help—it stops hurting so much and actually feels really good afterward.
20150915_224140
Photo Courtesy of Candii Crusher


How do I foam roll you may be asking? There are myriads of videos on YouTube showing you exactly how; essentially you are using your own body weight to work on your muscles. At first it may feel awkward and weird and you will wonder if you are doing it right. It gets easier with time, and I am happy to show you how to roll at practices. I generally foam roll my legs every day when my knees are bothering me; otherwise, I try to do it on days of heavy exercise (like after derby practice!). You should roll fairly slowly, and you can even “sit” on a tight muscle for 5-10 seconds, holding it before you roll it out. Rolling a specific area for more than one minute is not recommended, as that can lead to more soreness. You don’t ever want to roll a bone or a joint—only muscle. If it hurts too much to roll a specific muscle, roll the areas around it—that will still help loosen up the offending area. With foam rolling, much like stretching you might feel some “good” pain but it shouldn’t be excruciating. Always listen to your body, and always talk to your doctor about any pain or health concerns you may have. Once you’ve been at it for a few weeks, your muscles should feel looser and less sore after foam rolling. Try to work it into your workout days—much like stretching, rolling can prevent injury and help you keep in tip-top shape for derby!

Thursday, October 4, 2018

Knee Strengthening

Knees are important!  Making them stronger is something that is needed for roller derby.  They will take a beating, but here are some exercises to help strengthen them up.


Roller Derby Athletics has a Happy Knees Training video.  It's short and sweet and fairly easy.  Take a view at it here or over on YouTube.


Here is a short routine that you can use as an off skates warm up:
  • Marching in place – 30 seconds
  • Lunges – 15 reps each side
  • Lateral lunges – 15 reps each side
  • Skater squats – 15 reps
  • Step ups – 15 reps
  • Prone hamstring curls – 15 reps each side
  • Russian hamstring curls – 10 reps
  • Calf raises – 15 reps
  • Scissor jumps – 15 reps
Each exercise should take around 30 seconds.  Set aside 15 minutes to get three rounds in. 

Remember to invest in some nice, cushy knee pads.  While we practice falls, please remember to fall softly and to not slam your knees on the ground; a nice tap-tap will work out well.

Your knees are going to be with you for a long time after derby, take care of them now.

Wednesday, September 26, 2018

Toe Stop Drills and Skills

We started working with our toe stops this week. If you are able to utilize your toe stops in a controlled manner, it can take you far in derby.  Remember, practice makes you better and practicing on your toe stops makes you more comfortable. 


First off, take a look at your toe stops.  Where are they positioned for you?  You need it positioned where you feel comfortable and your foot isn't dying inside your skate.  Most people go with a one wheel under the back wheel and adjust their toe stops to that height.  How big are your toe stops?  If you have crappy little ones, I would suggest saving to invest in some slightly larger ones.  This will make it much easier on you.  Smaller toe stops make you work much harder in your toe stop runs and drills. 


Here are a few easy things you can do to feel more comfortable on your toe stops:


Up Downs  -- stand in good derby stance with all eight wheels on the ground.  Shift your weight to go up on your toe stops by lifting up on your heels.  Your stance should stay the same and the only thing moving is your feet. 


Squats on your toe stops --  Go up on your toe stops and squat.  This will help you feel comfortable by being able to go lower on your toe stops.


Balancing on one foot  -- Go up on your toe stops, find your center of balance and pick up one of your skates.  This is like the one footed glide but on toe stops.  Engage your core and balance.  Challenge yourself each time to hold it longer.


Side to side steps on your toe stops  --  Go up on your toe stops and step from side to side.  Start with shorter steps and eventually move into larger steps.  Challenge yourself.  This will help with lateral movements down the road.


Toe Stop Walking and Jogging  -- we practiced this during the training session.  Get up on your toe stops and walk/jog forward then go backwards.  Find your center of balance and increase your speed as you go! 


These are all things you can do at home in your skates.  You can also do these during open skate.


Once you feel more comfortable on your toe stops, start pushing the comfort zone. Ask your trainers for more ideas on challenging toe stop drills. 

Tuesday, September 25, 2018

Week 3 -- More Derby Skills

By Striking Dervish


Now that you have covered some of the basics, we are spending Week 3 adding more derby skills as well as beginning to pick up our feet.

Off Skates Workout

We begin with a reminder of the things we can do off skates to help prepare us for our tested skills!
  • Jogging to work on cardio in preparation for your endurance test
  • Squat walks to work on derby stance
  • Wall sits build leg strength for proper derby stance
  • Lunges work leg strength for getting up from a single knee fall
  • Squat thrusts / burpees practice the movement of getting to toe stops from a fallen position

Stepping

In order to work on balance on your skates, we practice stepping while standing still.  While practicing this skill, please keep the following in mind:
  • Stay in derby stance with knees soft
  • Try to balance over all four wheels of each skate to avoid rolling
  • Engage your core
  • Lift your knees slightly to avoid rolling
  • Keep your eyes and chest up
All of these should be practiced and will be tested:
  1. Stepping Forward – take as large of a step forward as you can without rolling
  2. Stepping Backwards – take as large of a step backwards as you can without rolling.  Remember to pick up your knees in order to be able to place your foot wholly on the floor at one time.
  3. Stepping side to side – step out and together in either direction
  4. Hop-to’s – moving sideways, pick up the foot furthest from the direction you are going (foot A), hopping upward with the foot closest to the direction you are going (foot B), then set foot A down and step out with foot B.
  5. Grapevines – as controlled as possible, step over Foot A with Foot B, and step out with Foot A.  Then step behind Foot A with Foot B, and step out with Foot A.  Repeat a few times in each direction.  Try to keep your toes pointed forward at all times.

Toe Stop Run

Roller derby skaters get moving off the start line by running on their toe stops.  The toe stop provides better stability and a basepoint for pushing off to get started quickly.  New skaters will need to get comfortable on their toe stops before they are able to run on them.
In Week 3, we work on increasing speed and effectiveness of the toe stop run by using it to get moving when working on all other skills throughout the practice.

Getting Comfortable

We begin by simply walking on our toe stops.  The toe stops should be at a comfortable position where you are not balanced too much on the front wheels.  You may need to move the toe stops up or down (closer to the skate or closer to the floor), and they are adjustable in this fashion.  The specific position is a personal preference, and you may need to make a few adjustments before determining where yours should be.
If you have your own skates, spending some time walking around your house on your toe stops will help you get comfortable.  Remember to keep your knees soft and be wary of obstacles!

Jogging

Once you feel comfortable on your toe stops, try jogging on them.  Start with small steps and slow speed and gradually go for longer strides and more speed.
You will also need to practice transitioning between the toe stop and skating.  This should eventually be a seamless process and may require practicing setting the foot down on all four wheels from the on-toe position.

Running

The ideal toe stop run is 3 to 5 steps on your toe stops.  The strides should increase in length throughout the run, and you should increase your speed quickly by doing so.  Think of digging into the floor with your toe stops.  In order to make the most of the run, lean forward throughout, but keep eyes upward.  The lean should eventually feel close to falling forward and will actually help you with your momentum forward.

Baseball Slides

Baseball slides are the only fall we practice falling backwards.  We still “pick a cheek” and focus on the side of the body for this fall to avoid hitting our tailbone.  The application for baseball slides are when we are moving at a fast pace and may be careening out of control but falling backwards.

Standard

In a standard baseball slide, we are only focused on the fall itself, ending on our side on the ground.  To practice this fall, follow these steps:
  1. Set a knee down, similar to a single knee fall.
  2. Move the foot of the downed leg underneath you while pivoting the knee outwards. The downed leg should remain bent so that you are forming a 4 with your legs.
  3. As the foot comes forward, shift your weight to the side of the downed knee in order to ease onto that hip and side of the body
  4. Extend the arm closest to the floor so that your hand is above your head, and your arm acts as a cushion for your head.
  5. Continue easing yourself down to the floor until you end up stopped on the floor completely laid out on your side with the initially downed leg bend underneath you.
Things to keep in mind:
  • Focus on a controlled fall.  At no point should any part of your body slam onto the floor.
  • Try to keep the motion of the fall moving in one direction as opposed to veering off to the side.
  • Avoid flailing with the top leg.

Roll to Stomach

Separate to the “standard” baseball slide which ends on the floor, we also practice a baseball slide with roll to stomach which is completed by getting up off the floor.  The initial baseball slide is exactly the same, but once you have safely slid to your side, you roll to your stomach and then come to a standing position.
In order to get up, using your toe stops is preferable.  To break down the “getting up” portion:
  1. Roll to your stomach
  2. Raise onto all fours
  3. Lift your feet onto the toe stops so that you are in plank position
  4. Hop your feet underneath your body, landing on your toe stops (similar to the second half of a burpee/squat thrust)
  5. Once you are balanced on your toe stops with legs bent, stand up
Once you have the baseball slide with roll to stomach motion down, you may get to a point where you can time the roll to happen prior to stopping the slide and then use the end of the slide to get your feet underneath you.  In this way, no hop to your feet is necessary.  Instead your toe stops go down and you bend your legs to catch your momentum at the end of the slide until your toes are underneath you and you can stand.

Single Knee with 180 Turn

Many times, after a fall, we will not be facing the track.  If we are able to turn ourselves towards the track before stopping, we can then stand up and quickly get back to game play using a toe stop run.  For this reason, we practice the single knee fall with a 180 turn.
To perform this skill, we start with the basic single knee fall.  Before coming to a complete stop, engage your core to remain slightly rigid in the upper body while you turn your shoulders towards the side of the downed knee.  Use that knee as a pivot point to turn around, removing most of the weight from the foot that is still on the floor.  Ideally, you will end up facing the opposite direction from where you started while still in the single knee fall position.
To get off the floor, try putting the front foot toe stop down and centering your weight over it to stand up.

Leaving the Ground

With all of the action that happens on the track, we need to be able to leave the ground to avoid unexpected obstacles or use quick feet to get to where we need to go.  For that reason, we practice jumping and hopping.

Jumping

By jumping, we mean leaving the ground from two feet and landing on two feet.  In order to do so, you should take off from bent legs and land on bent legs.  Your legs act as springs under you to give you power for the jump and to cushion the impact of the landing.  While working to increase height, think about bringing your knees up towards your chest as opposed to bringing your feet up to your rear.
For testing purposes, you will be tested on jumping over an object.  Remember to bring your knees up when going for height.  Note also that jumping forward is not necessary.  Your momentum skating towards the object will naturally move you past the object.  You only need to lift your feet over it.  A successful jump over a 3″, 9″, or 18″ object indicates a passing score for Class 3, 2, and 1, respectively.

Hopping

By hopping, we mean leaving one foot and landing on the other.  In order for it to be considered hopping and not stepping, there should be air space under both feet at one moment of time.  Similar to jumping, you should take off of a bent knee and land on a bent knee.
For testing purposes, you will be hopping through a line of people.  Don’t worry too much about this until we get to our pace week (Week 6).

Mohawks

While we are getting comfortable picking up our feet, we also introduce mohawks.  This skill will become more important next week when we add to it.  A mohawk in skating is when we have one foot facing in each direction (one forwards and one backwards).

Finding the Position

To get the feel of the position, you can face a wall and place the insides of your feet against the wall.  Make sure that your feet are far enough apart and that your knees are bent.  This will require opening up your hips, and may take some practice.
When attempting a mohawk while skating, you will need to balance on one foot, pick up the opposing foot, turn it fully backwards, and place it down at the heel of the forwards foot.  This position will not be easy at first and is why we practice it against the wall.  You have been practicing t-stops, and your foot very well may want to set down in the T.  You may need to think about overturning your foot in order to get the placement.  If the foot is not fully turned backwards, you will likely turn in a curve.

Mohawks Around the Turn

In order to gradually get to the full mohawk position, you can start by doing mohawks around the turn.  In the counter-clockwise direction, this means balancing on your right foot, picking up your left foot, and setting it down backwards.  Traveling around the turn requires you to open up your feet into a v, and not a full mohawk.

Mohawks in the Straightaway

Once you feel comfortable in the turn, you can try the straightaway, which requires fully turning your foot backwards in order to continue a straight path.

Crossover Work

Last week we worked on edging and the ability to hold a one legged glide during a turn.  Believe it or not, this is the first obstacle in learning crossovers.  We continue our work on crossovers by purposefully changing our edging base leg around the turn (or stepping around the turn).  Next week we’ll start working on increasing the efficiency of the crossover.

Conclusion

This week we added a few specific skills to our repertoire, but the main focus was on picking up our skates (through stepping, hopping, and jumping), and using our toe stops in their two major derby functions (getting started and getting up off the floor).  These skills are essential for derby skaters and are getting us closer to the track!
Thursday, September 13, 2018

The basics: Plow Stops

Plow Stops are the second derby stop that we learn in practice.  Plow Stops are my favorite and so much more effective than a T-Stop. 
Remember the three steps to a plow stop:
  • Spread your legs a bit wider than your shoulders.
  • Use your butt as a counter balance and sit down lower. 
  • Push on your inside edges.  Push your toes together and your heels down into the ground.  Dig those edges until you stop.  Some people can stop on a dime, others take a little longer and it’s okay.
Mel Breakdown throwing a plow stop during the game.
Start low!  Like everything in derby, it is harder if you are standing up or not as low as you could be. 
Make sure your knees are bendy!  Do not lock your knees.  You lose your stability you had when you were low.  We know you aren’t low if your knees are locked.
The stop comes from your inside edges.  Those wheels will slip and you will hear a chattering noise.  This is completely normal.  If the plow stops are quiet, you are not putting enough pressure on your inside edges.  Get the feel for it.  One side might require less pressure than the other.
Stay low and don’t be like a buoy and bob around.
Here is another good source for information on Plow Stops:

Saturday, September 8, 2018

MADE Rules Breakdown -- Topic One


M.A.D.E. Rules Discussion   -- Topic One
Game Parameters
A game lasts for 60 minutes.  The 60 minutes can be divided up into halves or periods as each league sees fit.  Fountain City Roller Derby uses the four 15 minute periods of play.
Each jam can last up to 90 seconds.  The Head Ref will signal the start of the jam by one short whistle blast.  Each jam is ended by one long whistle blast.  The jam can be ended on time or called off by the lead jammer and in some cases a thumbs down injury.
There is up to 30 seconds between each jam.  Each team has 30 seconds to position their skaters on the track.  If you field too many players, this is a team penalty and must be served by a skater.  If you skate a player short, the other team automatically gets a point upon the start of the jam.
Each team has five players on the track for each jam:  One Jammer, One Pivot and Three Blockers.  The jam will always start with a Jammer and Pivot being fielded.  If the Jammer from the previous jam is still in the penalty box, they will become a blocker on the next jam.
Each team has a total of four timeouts.  They are split evenly between periods.  Timeouts do not carry over from period to period.  Only Coaches and Captains may call a team timeout.  They do so by forming a “T” with their hands and calling timeout to the referees.  Officials can call as many time outs as they would like.  Timeouts are signaled with four short whistle blasts.
The team with the highest amount of points wins the game.
If the score is tied after regulation play, there is a Sudden Death jam.  The first team to score wins.
M.A.D.E. Slaughter Option: Within the last five minutes of the third period, should one team be leading by more than 50 points, the teams may convene and decide if the fourth period will be played.  The trailing team is the one that makes the decision.
M.A.D.E. Coed Structure:  No more than two male members per jam.  Cannot field a male jammer/pivot combo.
Questions and scenarios will be posted on the Facebook Group, please answers those in the threads provided and if you have questions, feel free to post them.  This information is needed for your written test towards the end of training.

Sunday, September 2, 2018

What to Expect from Practice


Your first practice is coming up soon!  That’s awesome and we can’t wait to meet and greet and teach everyone about the world of roller derby!  Here are some tips and tricks on preparation for your first practice.

Procure your gear!

You’ll need gear!  While we do have loaner items, they are first come, first serve.  If you need to borrow the leagues gear for the first couple of practices, please arrive around fifteen minutes early to be able to find the gear you need and be geared up in time for practice.  Remember, we do not have loaner mouth guards!  B&D Skating Rink, Derby 4 All and sports stores sell them.  

Pick out your first day of school outfit!

Here is a guide to Dressing Derby!  If you have questions, please ask. 

When and Where?

Check the calendar!  It’s on this blog and it was also given to you in print form.  All practices are held at B&D Skate Center in Independence.  Remember to schedule drive time to make it to practice on time!  Be ready to go at the start of practice.

Make a Practice Day Plan

To prepare for practice drink plenty of water.  A Staying Hydrated blog post has been made.  Make sure to bring a bottle of water during practice.  You might want to bring a few snacks for after practice.  If this is your first time meeting with us, you will need to sign a waiver and complete contact information online.  There will be plenty of copies of the waiver available.  Don’t forget the rink fee for September.  That can be paid at the first practice.

Relax and have fun!

Remember, this is the first practice for a lot of people.  Relax and have fun.  It’s okay to fall.  Falling is learning.

Have questions?  Ask them!  There will be plenty of trainers available for you to ask questions to.

Saturday, September 1, 2018

Toolkit for Practice

by One Hit Thunder
Gear


When coming to your first practice you will only need a few things in your toolkit:
  • Mouthguard
  • Safety Equipment – if you have it
  • Skates – if you have them
  • Water Bottle
  • Willingness to learn
  • Ability to listen – make sure not to have side conversations, everyone needs to hear the trainers instructions
  • Great attitude
  • Desire to have fun


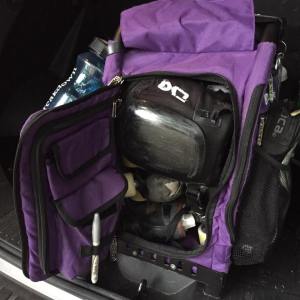
As time goes on you may want to add to your toolkit.  We have compiled a list of items found in many vets bags. Don’t run out and buy everything on this list, every skater likes different things.
  • FullBag
  • Skate tools including a combo-tool, allen wrench set, adjustable wrench, bearing tool-remember you need to be able to adjust your trucks, toe stops, and wheels.
  • Duct Tape-this is used for many things including holding pads on to keeping skates from causing blisters.
  • Band-aids
  • Deodorant
  • Ibuprofen or other pain reliever
  • Baby wipes for cleaning wheels
  • Towel/handkerchief for sweat
  • Lace puller and shoe horn for getting skates tight
  • Granola Bar or Energy Chews
  • Chap stick
  • Anti-odor device – silica packs, a thin sock filled with crystal cat litter, zum yoga mat spray, febreeze, etc… everyone uses something a little different.
  • Dry bag for wet clothes
  • Water Bottle


You may also want to have some spare items too:
  • Laces
  • Mouthguard
  • Tights/leggings
  • Wheels and bearings
  • Water bottle
  • Shirts with name on the back in league colors for scrimmages
  • Socks
  • Hair ties
Every skater likes different things, so do not run out and buy everything listed above.  If you ever find yourself needing something, just ask, chances are someone will have just what you are looking for.

Wednesday, August 22, 2018

Watching Game Footage

Watching derby footage is one of the best ways to learn the game!  Since, most of you, are just starting out in the derbs, it is important to watch the footage to get to the know the rules of derby. 
Fountain City Roller Derby currently skates under the M.A.D.E. Rule set, but dabbles in the WFTDA and USARS rule sets for travel team and mash up games.  Watching any type of derby makes you a better derby player.


Posted below are some of the recent Fountain City games, both open division and women's house teams. 


Take notes, ask questions, watch certain players, watch jams numerous times.  Post your questions on the FCRD Recruitment Boards.  There are members of the league that will watch derby footage with you and help you understand.  Just ask.  


Thursday, August 9, 2018

Staying Hydrated

by Veruc Assault


It’s hot out there, and roller derby practice will work up a sweat! Make sure you are hydrated throughout practice as well as throughout the day so you can get the most out of your practice time.

Why Water is Important

  • Water makes up over 50% of our body weight and 70-75% of our muscles. You cannot go a week without consuming water of some form.
  • Water helps with digestion and absorption of minerals and nutrients in our body.
  • Water helps maintain your body temperature.
  • Water protects your vital organs.
  • Without water your body can reach a state of dehydration. 

Ensuring You Are Drinking Enough Water

You should consume enough ounces of water per day to equal half of your body weight in pounds. This can be through liquids and food. Example: If you weigh 140 pounds, you should consume at least 70 ounces of water.
Signs of dehydration to watch for:
  • Cramps
  • Fatigue
  • Increased heart rate
  • Increased body temp
  • Decreased muscular strength
  • Slow reaction time
  • Poor concentration
  • Shortness of breath
In one hour of exercise, your body can lose up to one quart of water. So keep the fluids going during practice. Here is a simple guide on how to prevent dehydration:
  • Drink 16-24 oz of water two hours before practice.
  • Drink 8 oz during warm ups.
  • Drink 6-12 oz every 15-20 minutes during practice.
  • Drink 8 oz, 30 minutes after practice is over.
Your body weight should be the same before practice and after practice.

Resources

www.cdc.gov/nutrition/everyone/basics/water.html
www.eatright.org

Tuesday, August 7, 2018

The Basics: Derby stance

Fresh Meat Derby Stancing


What is Derby Stance?
Derby Stance: The basic body position that provides stability, speed, agility and power when playing roller derby.
Balance is crucial in roller derby! Bending your knees, tightening your core and keeping your head up are keys to balancing in derby stance.


How to Execute Derby Stance

  • Squat down. Your feet and knees should be shoulder width apart, balancing your weight between your feet.
  • Bend your knees to a 90-degree angle. They should be directly above your skates.
  • Hold your back straight.
  • Open your chest up, making sure your shoulders are pressed back.
  • Your shoulders, knees, and toes should all lineup.
  • Get LOW! Getting low will let your legs work as shock absorbers when you get hit and help stabilize your body.

Why Derby Stance is Amazing

  • It’s harder to fall.
  • If you do fall, you will most likely fall on your protected knees.
  • You can skate faster.
  • You can execute a proper crossover.

How can you practice derby stance at open skate?

Leg Burners

Start out by skating one lap at regular speed. Once that lap is completed, sprint half a lap (you don’t have to go incredibly fast, just enough that you will not stop while you are coasting). After you have sprinted half a lap, squat into proper derby stance position and coast half a lap maintaining derby stance and not lifting your skates off of the ground. After you have made it half a lap, sprint again for half a lap, then repeat derby stance for a half a lap. Continue doing this for a lap or two. You will figure out on your own why they are called leg burners. Remember to keep your hands at your sides to avoid supporting yourself with your arms.
Phase 2: While in derby stance, move your feet apart and together repeatedly without your wheels leaving the floor in order to continue to propel yourself while in derby stance instead of just coasting. We call these “watermelons,” and it requires using the muscles of your inner thighs and outer glutes to maintain speed. These muscles are extremely important in roller derby! See how far you can continue this stance without stopping or standing upright.

How to Practice Derby Stance at Home

Wall Sits

Sit with your back against the wall and your thighs parallel to the ground. Keeping your back flat against the wall, hold the position for 30-60 seconds, release and rest for 30 seconds, then repeat. Keep your hands at your sides! Though this is not exact derby stance (since your weight is leaning backward), it will work the leg muscles necessary for derby stance.

Plain Old Squats

Execute a derby stance, bending your knees to 90 degrees, keeping your feet and knees shoulder width apart and your hands at your sides. Hold for a moment and stand up again. Repeat for a set of 10. Repeat for 2-3 sets.
If you are uncertain if you are getting low enough, try using a chair. It should be at the proper height for you to sit in with your legs at 90 degrees. Perform your squats by standing 6 inches in front of the chair and barely touching the seat while squatting.

Common Mistakes

Are you actually getting low?

Many skaters will think that they are getting low, but they are actually bending at the waist instead of at the knees. Focus on getting your thighs close to parallel with the floor. Your back should not be!

The Difference Between Speed Skating and Derby Skating

People with speed skating experience will often revert to speed skating stance, bending over at the waist. This is fine for going fast, but once hitting is introduced, the skater will be less balanced to take a hit.

Knee Pain

If your knees start hurting and it feels like the knee cap is being pulled to the outside, it is because you aren’t getting low enough to engage the hamstrings properly so the three front muscles are pulling the cap out of place. You may not feel it is natural to bend more, but it actually helps to alleviate the pain.

Pick Your Person: A Guide to Choosing Your Derby Name

By Parks And Wreck You’ve finally decided to strap on those skates and get out on the track, bumpin’ hips with the best of them, the wi...